Knowing how to set up your surgical room requires a minimum of knowledge in implantology, as well as cleaning, disinfection and sterilisation protocols. When it comes to dental surgery hygiene, most assistants are faced with a harsh reality – the dizzying gap between the theory (what should be done) and the practice (what can be done). In this article, we suggest taking another look at the rudiments of contamination risk when preparing your surgical room so you can better organise your gestures to reduce cross-contamination.
Hygiene & asepsis
We use these two terms constantly and yet most of the time identifying them clearly is not that easy. Let us take a moment to redefine them here:
- Hygiene: All the principles, individual or collective practices aimed at the preservation of health and the normal functioning of the organism.
Overall sanitary conditions in public spaces and workplaces. (LAROUSSE) - Asepsis: Absence of microbial germs that could cause infection. (LAROUSSE)
Hygiene is therefore considered to be a set of methods and practices that aim to achieve or maintain asepsis.
In this article, we will not go into the basics of dental practice hygiene and equipment sterilisation. Assuming you keep your treatment room or operating theatre clean under all circumstances, the difficulty lies rather in preparing the surgical drapes prior to a surgical procedure.
Single items or kits?
You have two choices. Either you can order your surgical items separately ( surgical drapes, gowns, masks, sterile gloves, etc.), or you can opt for an optimised standard surgical kit.
Single items
This is the ideal option if you want to prepare your room or block in a way that best suits your needs, as each drape and gown will be put to good use. It is the perfect choice for when your requirements change according to the operations you have scheduled (an extra instrument tray, a sinus lift, a centrifuge for a PRF procedure planned for another patient, etc.). However, this way of working requires paying rigorous attention to inventory management. Stocks do not drop at the same rate – they have to be replenished regularly if you want to have enough available to meet your schedule’s demands.
It should be remembered here that each item used during surgery is subject to traceability. At a time when we are seeking to reduce our environmental impact, the traceability of each sterile blister pack will have to be dealt with, as will the significant waste this may generate. Further, as we will see when looking at how to set up your surgical room, opening multiple non-sterile packets increases the risk of asepsis.
Standard kits
Standard kits are often criticised for being too full or not full enough. However, this is often due to a poor assessment of user needs, since kits come in a number of formats (from the most concise to the most comprehensive). Kits are packaged in such a way as to facilitate the setting up of the surgical block. All the essentials are grouped together in a single package, thus eliminating the possibility of forgetting a particular item or having to reorder it at the last minute. Cross-contamination risk is thus already reduced as the dental assistant who prepares the room no longer needs to leave it.
Further, this simplifies inventory management, since one surgical procedure = one kit. The same applies to traceability, which entails recording the number of one kit only, rather than the numbers of all the packages opened. If the kit contains an item that will not be used on this occasion, it will more than likely be utilised at a later date for a general practice treatment. The item can therefore be “recycled” and put to good use.
No aseptic errors
If you are lucky enough to have a dedicated surgical block to work with, always ensure that the area is properly cleaned. If you have to adapt your usual treatment room for surgery, clear the work surfaces of all objects that will not be used in implantology and ensure that the area is disinfected with a suitable product.
Steps before opening the kit
- Put on a surgical mask, protective glasses, a cap and overshoes.
- Wash your hands with a mild soap for 1 minute. Dry them well.
- Put on a single-use gown.
- Put your gloves on over your gown.
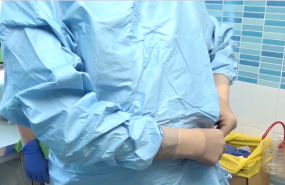
Then go into the surgical room and collect all the instruments and materials you will need to perform surgery. Now you can prepare your block with the sterile kits. Carefully open the kit’s blister pack without touching the contents and let it slide on a flat, disinfected surface (bridge table, mayo table, work surface, etc.).
Do not forget that the kit’s sterile contents must not come into contact with any source of contamination. What is clean is not necessarily sterile, so everything that is non-sterile should be considered as contaminating.
You will need to pinch the flap that sticks out to open the kit without contaminating the inside to access the sterile equipment and the kit’s entire contents.
Now take off your non-sterile gloves. Wash your hands according to the surgical hand washing procedure and then don your sterile gown and gloves.
You are now ready to prepare your room without making any aseptic errors.
TIPS & HINTS
Polyethylene gloves
We tend to set these aside a little too quickly, which is a mistake. If you need to open a drawer or touch a non-sterile container in a hurry, put them back on to preserve your sterile gloves during handling, and then remove them. You can also use them to cover a scialytic lamp handle that is too long. If you are on your own with the dentist surgeon, your gloves can be used to open the packets containing your surgical and implant kits, or to open the implant wrapping when the implants are ready to be fitted. In this way, your gloves are kept sterile.
Panoramic and x-ray scan
The dentist surgeon is blind without these. Remember to bring them up on your computer screen when cleaning your room and to disactivate your computer’s standby mode. You should not touch the computer mouse once the room has been prepared.
Tube sleeves
Covering surgical suction devices can be a real headache. Most brands offer suction systems with removable autoclavable tips. Make sure you always have a set in a sterile sachet so that you can place your sterile sleeve over the sterile tip. Use the cardboard inside the plastic sleeve to open it and gently slide the suction device into it (especially if you find it difficult to cut the suction completely during handling).
Traceability…
…starts long before the room is prepared. Ensure that your instruments have undergone an optimal sterilisation cycle before deploying them on the operating field. Place a Bowie-Dick test between the two bags containing the material before autoclaving. The test can be read at a glance and guarantees the cycle’s quality.
In conclusion, stress and a lack of preparation are the two main vectors of aseptic errors. Recalling your last surgical procedure and the steps involved is the best and most ideal way to calmly prepare beforehand everything that needs to be done. To achieve even greater peace of mind, ensure that everything that can make managing the surgical procedure easier is to hand – from preparing to managing traceability. The more you can do to make your life simple, the more your protocols will be exemplary, applicable and consistent.

Mrs. Jo-Han-Green PAYET
EVOLYOU
- Certified trainer
- Training manager at Evolyou
- Dental office assistant for 15 years: prosthesis, implantology, periodontology
- Tutor of trainee assistants
- Head of operating room Evolyou
- Product trainer Lyra Etk
![]()
![]()
![]()